Tag: How to
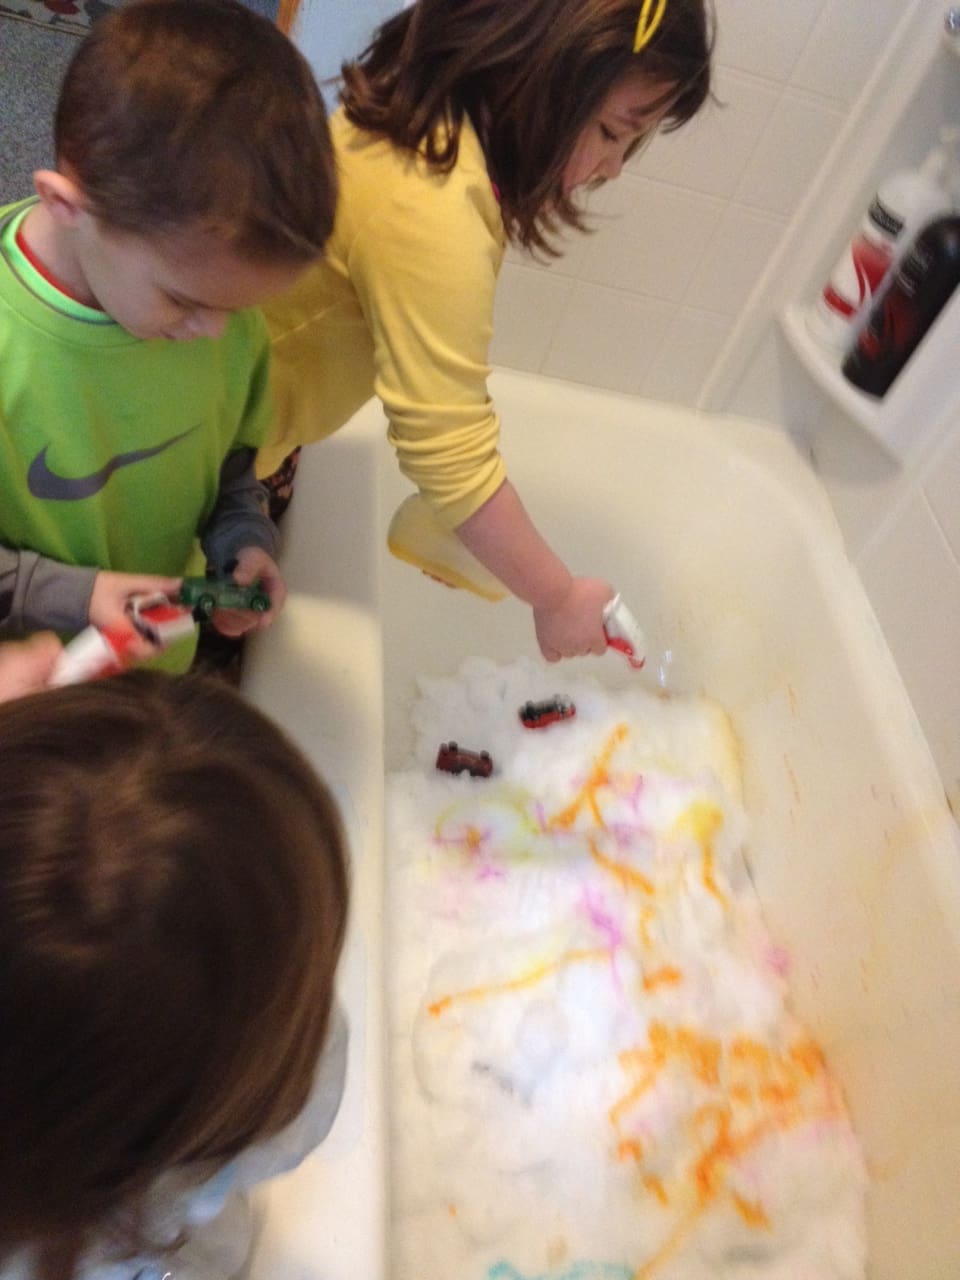
Try This: Bathtub Snow Graffiti
By Amanda Crowe, Assistant Educator Follow-up to “Winter Wonderland” Playdate, Thursday, February 6, 2014 When ice storms block your children from going outside, you can still give them the opportunity to be spontaneous and creative with nature by bringing the outside in. Snow. One of the most elemental, memorable art mediums from your childhood. Recreate those memories for your little ones by making your bathtub the canvas! With easy clean up and minimal effort, your child can be the bathtub graffiti artist of your household.
Guided Visualization for Children, or How to Take a Trip with Your Kids Without Leaving Home
Follow-up to “Sunshine Playdate,” Thursday, January 9, 2014 Grown-ups and children alike are affected by the weather in Ohio. Gray, cold days can take hold of anyone’s moods and when it’s too cold to go outside for days on end, your child’s abundant energy needs an outlet! Creative visualization is one way to take a trip while enjoying the warmth of your pajamas! Let your child be the captain as their imaginations drift away by using simple storytelling and props on a fun, guided journey
How To: Have your own Messy Playdate at Home
By Amanda Crowe, Assistant EducatorFollow-up to Creative Playdate: Messy Playdate, December 5, 2013. Kids love to feed their curiosity by making a mess and using their senses in the creative process. Research for the education of the young child shows that more mess-making leads to higher forms of learning. Homemade Peppermint Playdough:Supplies:1 cup flour1/4 cup salt1 tsp cream of tartar (for smooth texture)1 cup water1 tbsp oil food coloring (cake decorators paste or liquid makes great colors)1 tbsp peppermint extract (easily found at craft stores
How To: Make a Thankful Tree
By Amanda Crowe, Assistant EducatorFollow-up to Story Time in the Galleries on November 21, 2013Bridging language connections to art-making deepens a child’s understanding of and appreciation for literature, the arts and the world they live in. Carry out the message from our reading of “Sylvester and the Magic Pebble,” by author William Steig, through creating “thankful trees” at home.Supplies:Paper, cut into small, individual piecesRibbon or shortened pipe cleanerSmall terracotta potsSmall Styrofoam ball to fit snugly inside the potCotton batting to cover the StyrofoamArtificial pine branches
How To: No-Sew Lavender Eye Pillow
By Amanda Crowe, Assistant EducatorFollow-up to Creative Playdate: Yoga for the YoungHelp your child relax while crafting this simple no-sew lavender eye pillow.Supplies:1 tube sock cut down to 10 inches long (cut off foot portion and elastic band near knee)1 cup dried lavender flowers or 6 drops essential lavender oil1 ½ cups buckwheat hulls or uncooked riceRibbonDirections: Close the sock at one end by typing with a ribbon. Fill the sock with the lavender and buckwheat hull filler, allowing enough room to close the other
How To: Plantable Art
Supplies: Used paper Warm water Bucket Blender Liquid water colors OR colored tissue paper (bleedable) Flower seeds (small) Plastic stitchery canvas Extras: Plastic tracers and/or cookie cutters Directions: 1. Rip and tear pieces of paper, do not use scissors because the rough edges are necessary. 2. Place pieces of paper in a warm bucket of water. Once paper has been in the water for a few minutes, tear pieces into smaller shreds. 3. Add liquid water colors or bleedable tissue paper to the water/paper mixture.
How To: Plastic Bag Fabric
Inspired by Untitled by Alvin Demar Loving Jr. Supplies: Plastic bags (variety of colors, patterns)ScissorsIronsParchment paper Extras: Sewing machineThread Directions: 1. Collect plastic shopping bags. Look for interesting colors, patterns and designs. 2. Cut the plastic bags into shapes. Holding the bag taught makes it easier to cut. 3. Layer the cut pieces onto a larger shape of plastic bags. Create at least 6 layers but the more layers there are, the stronger the fabric will be. 4. Sandwich the layers between pieces of parchment
How To: Plastic Bottle Beads
Supplies:Plastic bottlesScissorsEmbossing heat gunsPermanent markersNeedle nose pliers (insulated) Extras:String or wireBeads Directions:1. Collect and rinse plastic bottles. Try experimenting with different colored plastics.2. Carefully cut the bottles into strips, varying the width of the strips will create different size beads.3. Decorate the strips with permanent markers creating designs, patterns, or even writing a secret message.4. Roll up the plastic strips and hold firmly with the pliers.5. Heat the plastic with the heat gun and watch the plastic shrink and harden. When you are finished, let


